Button flashing red – what does it mean?
As soon as a Protonet box cannot be started as normal, it starts up in rescue mode.
In this mode, the start button may flash red at one of two different speeds:
- Very rapid flashing (meaning that neither an internal stick nor a hard disk has been detected): Please contact Protonet Support directly for further analysis!
- Flashes two times per second (means that no hard disk has been detected)
If the button flashes more slowly: a live system will be started. After a few minutes, a WLAN with the name “protonet” will appear. You can connect to this network to find out more details.
Log Entries and What They Mean
“Forced booting into resuce!”
A “rescue” file has been found on the USB stick. The system understands this as a command to start in the RescueSystem.
“Protonet Storage could not be created!”
Protonet Storage ZFS could not be “installed” on the hard disk. The hard disk may be formatted, broken or not connected.
“No Protonet Firmware found on LiveFS.”
No Protonet firmware (file with the file ending .firmware in the USB stick folder /firmware) could be found. Stick may be defective or tampered with.
“Firmware Version ‘$firmware_name’ not found in ‘$firmware_on_storage_path'”
The firmware was found on the stick and extracted to the hard disk. $firmware_name corresponds to the name of the firmware as recognised by the USB stick. However, it appears as though the packed firmware in /protonet/firmware is called something else. As a result, /protonet/firmware/current cannot be created.
“Mount of firmware failed”
Firmware cannot be found/mounted on the hard drive.
“Modprobe squashfs failed.” or “Modprobe overlayfs failed.”
Software on the internal stick is defective.
“Compose of root-overlay failed.”
Hard disk and copy-on-write cannot be merged as part of a root file system.
“Move storage failed.”
Mount point of the hard disk could not be moved to /protonet.
“Move stick failed.”
Mount point of the USB stick could not be moved to /protonet-stick.
“Modules copying failed.”
Kernel modules could not be copied in the system to be started.
“Please bring me home! Couldn’t mount my roots, feel lonely.”
Only seen if a monitor is connected. Live System not found from the USB Stick. USB stick defect. Contact support.
Set static IP-Address and network information (SOUL 2.x on CoreOS)
- Connect to the server via ssh or command line
User: platform
Password: Current maintenance password - Identify the active network
Run following command and check the output of the first 8 entries:
ip addrThe active network interface is marked with “
state UP“.
In our example below entry no.2 reflects the active network interface. - Get the MAC-address (link/ether) from this entry. In our example “0c:c4:7a:c4:ab:bc” would be the correct one.
- Next create a configuration file containing the desired network information and open it in VIM editor:
sudo vim /etc/systemd/network/static.network
Pressing the key “i” enables you to edit the file. Now add the following content – but of course with your specific network information:[Match] MACAddress=0c:c4:7a:c4:ab:bc[Network]
Address=192.168.0.15/24
Gateway=192.168.0.1 - After filling sections “MACAddress”, “Name”, “Adress” and “Gateway” with your specific values, save the file:
- Press key “esc”
- Type “
:x” and press “Enter”
- Activate the new configuration with following command:
sudo systemctl restart systemd-networkd
Example output ip add
platform@testserver ~ $ ip addr
1: lo: <LOOPBACK,UP,LOWER_UP> mtu 65536 qdisc noqueue state UNKNOWN group default qlen 1
link/loopback 00:00:00:00:00:00 brd 00:00:00:00:00:00
inet 127.0.0.1/8 scope host lo
valid_lft forever preferred_lft forever
inet6 ::1/128 scope host
valid_lft forever preferred_lft forever
2: eno1: <BROADCAST,MULTICAST,UP,LOWER_UP> mtu 1500 qdisc mq state UP group default qlen 1000
link/ether 0c:c4:7a:c4:ab:bc brd ff:ff:ff:ff:ff:ff
inet 172.16.12.209/16 brd 172.16.255.255 scope global dynamic eno1
valid_lft 81215sec preferred_lft 81215sec
inet6 fe80::ec4:7aff:fec4:abbc/64 scope link
valid_lft forever preferred_lft forever
3: eth1: <NO-CARRIER,BROADCAST,MULTICAST,UP> mtu 1500 qdisc mq state DOWN group default qlen 1000
link/ether 0c:c4:7a:c4:ab:bd brd ff:ff:ff:ff:ff:ff
4: wl_private: <BROADCAST,MULTICAST,UP,LOWER_UP> mtu 1500 qdisc mq state UP group default qlen 1000
link/ether 00:0e:8e:6d:78:0b brd ff:ff:ff:ff:ff:ff
inet 10.42.0.1/16 brd 10.42.255.255 scope global wl_private
valid_lft forever preferred_lft forever
inet6 fe80::20e:8eff:fe6d:780b/64 scope link
valid_lft forever preferred_lft forever
5: eth2: <NO-CARRIER,BROADCAST,MULTICAST,UP> mtu 1500 qdisc mq state DOWN group default qlen 1000
link/ether 0c:c4:7a:c4:ae:28 brd ff:ff:ff:ff:ff:ff
6: eno2: <NO-CARRIER,BROADCAST,MULTICAST,UP> mtu 1500 qdisc mq state DOWN group default qlen 1000
link/ether 0c:c4:7a:c4:ae:29 brd ff:ff:ff:ff:ff:ff
7: br-257682b47eea: <BROADCAST,MULTICAST,UP,LOWER_UP> mtu 1500 qdisc noqueue state UP group default
link/ether 02:42:bc:d5:c8:34 brd ff:ff:ff:ff:ff:ff
inet 172.18.0.1/16 scope global br-257682b47eea
valid_lft forever preferred_lft forever
inet6 fe80::42:bcff:fed5:c834/64 scope link
valid_lft forever preferred_lft forever
8: docker0: <BROADCAST,MULTICAST,UP,LOWER_UP> mtu 1500 qdisc noqueue state UP group default
link/ether 02:42:38:6a:28:6b brd ff:ff:ff:ff:ff:ff
inet 172.17.0.1/16 scope global docker0
valid_lft forever preferred_lft forever
inet6 fe80::42:38ff:fe6a:286b/64 scope link
valid_lft forever preferred_lft forever
Information for creating custom backup scripts (SOUL on CoreOS)
Please note: The following information are related to SOUL 2.x running on CoreOS
Implementing a custom backup script requires linux skills. Following information are intended to be used by experienced administrators and service providers.
# Setting up custom backup
## What needs to be backed up?
All user data and box configuration is stored in these two file system paths:
* `/data`

* `/etc/protonet`
## How can I run a periodical backup?
*See also the CoreOS documentation: https://coreos.com/os/docs/latest/scheduling-tasks-with-systemd-timers.html*
Create a task that performs your desired backup – obviously also make sure that authentication is set up correctly,
for example that the user root has an SSH public key deployed to the target host in this example.
# File: /etc/systemd/system/custom-backup.service

[Unit]
Description=Makes a backup to a remote host
[Service]
Type=oneshot

ExecStart=/path/to/backup-program --with-proper-arguments-for-sync
Create a systemd timer. See also the Arch Linux Wiki: https://wiki.archlinux.org/index.php/Systemd/Timers for details
on the various available timers.
# File: /etc/systemd/system/custom-backup.timer

[Unit]
Description=Run custom-backup.service once a week
[Timer]
OnCalendar=weekly

Persistent=true
Creating your own backup is handled as a custom specific change which is not reflected within default support range. If you need help implementing or maintaining such a change, we can get you in touch with our technical partners.
I’m having trouble connecting to the Protonet solution. What should I do?
This can have different causes
- Issues or restrictions on the computer you are using
- The internet access the solution is connected to is down or slow
- Cables are not plugged in correctly
- There are network changes or issues
- Protonets proxy infrastructure is under maintenance
Note: In case of issues or limitations regarding the proxy infrastructure, we will post information here on the main page and within the news section.
Troubleshooting checklist
- Am I the only one experiencing the issue?
- Can the box be reached by using its internal IP address?
- Is the box switched on and the network cable attached to the network outlet / switch / router?
- The easiest way to check whether the box is connected to the router correctly and can establish a connection to the internet is to open the update page within the system settings. If it loads correctly, the network setup and cables are fine.
- When that is not the case please check whether the box is listed correctly in your routers interface.
- Is there an external hard drive or memory stick still connected to your box?
- Please remove it and restart the box via its button (one short press should suffice). Retry connecting to it after about 10 minutes.
- Was the box’s web address changed?
- Has a firewall been set up or changed?
- Does the internet connection that the box is using work?
- The easiest way to check whether the box is connected to the router correctly and can establish a connection to the internet is to open the update page within the system settings. If it loads correctly, the network setup and cables are fine.
- If this is the case: Go to the system settings and switch off the internet address, save and wait one minute. Switch it back on and save again. By doing this – or better even, restarting, the connection to our proxy is forced to refresh and your server should be reachable again afterwards.
- Every 30 restarts, the box performs a file system check to make sure all data on it is without error.
- This can delay the servers start up to 45 minutes.
- You can verify that this is the case by connecting a display. A reboot does not skip it.
How to connect and setup Protonet servers?
Protonet Serves are being delivered with a user instruction brochures covering the setup and initial steps:
The brochures contain the following instructions:
Maya
Carla/Carlita
SSH access over the internet
The easiest way to establish an SSH connection to the Protonet server with a unix-compatible OS (MacOS, Linux) over the internet is to use an alias:
alias nodessh=’ssh -o “ProxyCommand nc -X connect -x ssh.protonet.info:8022 %h %p” -o “User protonet” -o ServerAliveInterval=15 -o ServerAliveCountMax=3′
It can be persisted in the .bashrc-Datei in the users home directory. Connections can be created as follows:
nodessh SERVERNAME
SERVERNAME means here the Protonet address without “.protonet.info” – SERVERNAME.protonet.info
Within Windows it is easiest to use the tool Putty.
Enter the servers web address without the tailing .protonet.info like this
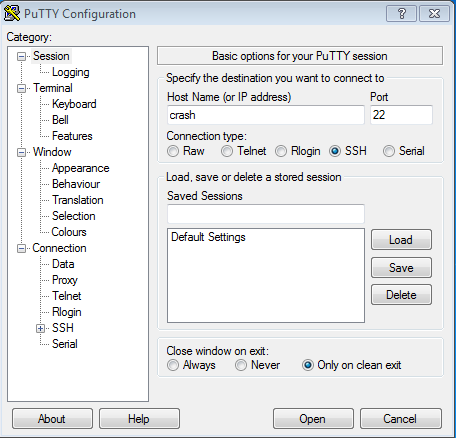
Set the user name to protonet:
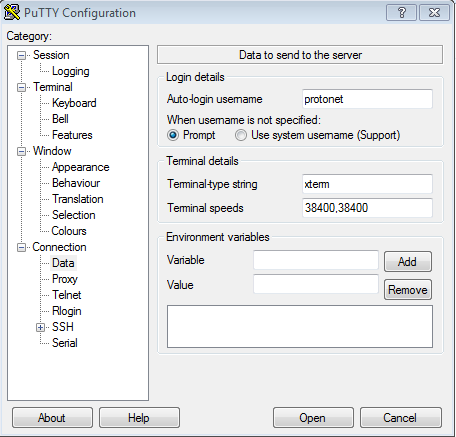
Finally, enter the HTTP Proxy ssh.protonet.info and the following command, as can be seen on the image below:
plink -nc -X connect -x proxyhost %host %port
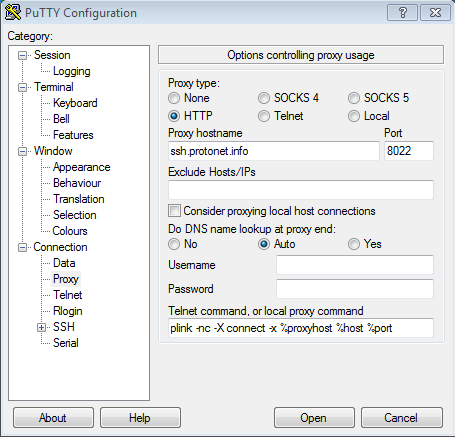
Pressing “Open” creates a console window that will ask for your servers maintenance password.
Maintenance password – what is it for?
The maintenance password is like a master key to the Protonet box. In the end of the setup assistant, when the web address has been set successfully, it is generated as a random value without being displayed and we at Protonet do not know it.
For maintenance reasons and as a general precaution the box owner should generate a maintenance password and store it in a secure place like a password manager. The maintenance password is necessary to access the server when software or hardware need to be analysed by support.
SOUL administrators can generate a new maintenance password via System settings > Maintenance. Each maintenance password is only valid until a new maintenance password is generated or set manually.
On the command line, the command masterpassword can be used to set a custom maintenance password manually. This password is valid for the user protonet.
Wrong storage capacity is shown
SOUL displays 234GB instead of 256GB? 10TB instead of 12TB? Or maybe 469 GB instead of 500 GB?
Don’t panic, everything is fine!
234GB is the actually available capacity of a normal Maya with a 256GB SSD.
A small explanation:
What is colloquially referred to and displayed by Windows as gigabyte (GB) is actually a Gibibyte (GiB). This is because computer storage capacity units are based on a power of two, not a power of ten such as other units that use Kilo, Mega, Giga and so on that are defined by SI (Système international dunités). Therefore, a gigabyte is not actually 2^30 bytes but 10^9 bytes. This is why, 100 GB becomes 95,37 GiB. This means that the storage sizes declared on hard disks and blank DVDs are actually correct, but wrongly displayed by Windows.
You can use this page to convert between the units.
Requirements & recommendations
Internet connection bandwith
Upstream
- Minimum: 2 MBit/s of upstream – for low data volume
- Recommended: 5 MBit/s of upstream or higher (SDSL/VDSL)
Downstream
- Minimum: 6 MBit/s of downstream – for low data volume
- Recommended: 16 MBit/s of downstream or higher
Internet router
- Required: 1 free ethernet port
- Recommended: Automatic IP address management via DHCP server (How to set static network information on the server)
LAN
- Minimum: 100-Mbit/s connection
- Recommended: Gigabit connection
WiFi
- Minimum: WiFi adapter supporting the n-specification (802.11n)
Background
We have chosen to include specific and powerful hardware and software components as well as technologies in our Protonet servers. For example, the built-in wifi access point has a transfer speed from 150 Mbit/s to 300 Mbit/s in the 2,4-GHz spectrum. The ethernet port is designed for a gigabit connection.
But these high connection speeds can only be reached if the components used in the local area network also support these standards. Otherwise, slower components will limit the performance of your Protonet server.
For example: A slow internet connection will negatively impact the transfer speed of data already or to be stored on the Protonet server.
Does the setup process require internet access?
Yes.
During initial setup the box needs to connect to a Protonet server in order to register a protonet.info-address and receive a valid license*. If the box is unable to connect to the internet for initial setup, the setup assistant can’t be finished.
*The update mechanism and email notifications will only work if the box was successfully registered during setup and received a valid Protonet license.
How to set static network settings on Protonet servers
By default Protonet Servers are expecting getting network information from a DHCP server.
If necessary, static network address information can be set using the command line utility netconf:

- During the setup routine, if network information are missing, the credentials necessary to access the Linux console are shown on the setup screen.
- You can access Protonet servers console by connecting screen and keyboard or via SSH. If a server is already setup, the current maintenance password is needed.
The user is “protonet”.
netconf
netconf provides two modes: The assistant and the command line mode.
The assistant is more or less self-explaining:
If you get the screen in German, please type 4 and press <Enter>. Then move on choosing the desired option by typing the according number and press <Enter> again.
netconf command line mode
netconf --help provides an overview of the flags available:
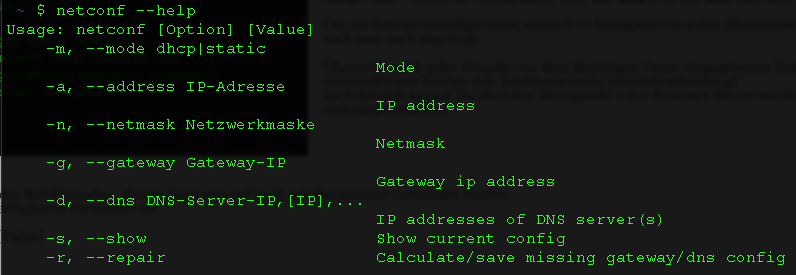
Examples:
- Show current settings:
netconf -s - Switch to dhcp mode:
netconf -m dhcp - Set static settings with two DNS servers (separated by komma):
netconf -m static -a 192.168.0.200 -n 255.255.255.0 -g 192.168.0.1 -d 192.168.0.1,192.168.0.2
Please double check any settings you made and keep the maintenance password in a safe place, in case you find network issues after the server reboot.
In case you did a mistake, simply move back to dhcp to revert to the default dhcp mode.
netconf should always be executed with the latest SOUL release. Before stable/59, the tool didn’t work properly on Carlas/Carlitas.
We have a firewall – anything I need to know?
Out-of-the-box Protonet servers are configured in a way, that they can simply be plugged into the internet router and get all information needed (via dhcp).
If a Protonet box can not be accessed by its *.protonet.info-address or if the initial configuration fails, your company’s firewall may need to be configured to allow access to our proxy infrastructure:
Protonet servers by default must be able to reach the IP-addresses
- New: 176.9.208.209
- New: 176.9.208.211
- 13.94.194.96
- 46.253.116.250
- 46.253.116.251
- 138.201.71.59
on target ports 22666 and 443. Alternatively, the Protonet network 46.253.116.0/24 can be added.
Additionally the ports 80 and 443 need to be reachable for software updates on this address:
- New: 94.130.54.181
- 13.73.161.233
- 138.201.198.118
On very restrictive firewalls you might also need to open the following ports for outgoing connections:
- https (TCP 443) – required for sending mails, protonet.info address and receiving updates
- http (TCP 80)- required for antivirus updates
- ntp (UDP 123) – required for clock sync
- webrtc (TCP/UDP 3478) – required for video calls
- dns (UDP 53) – required for name resolution
- smtp (TCP 25) – required with own smtp server configured
For the sake of simplicity, we recommend allowing all outgoing connections of the Protonet server via ports 22666, 443 and 80.
Box status – how to spot potential problems in SOUL
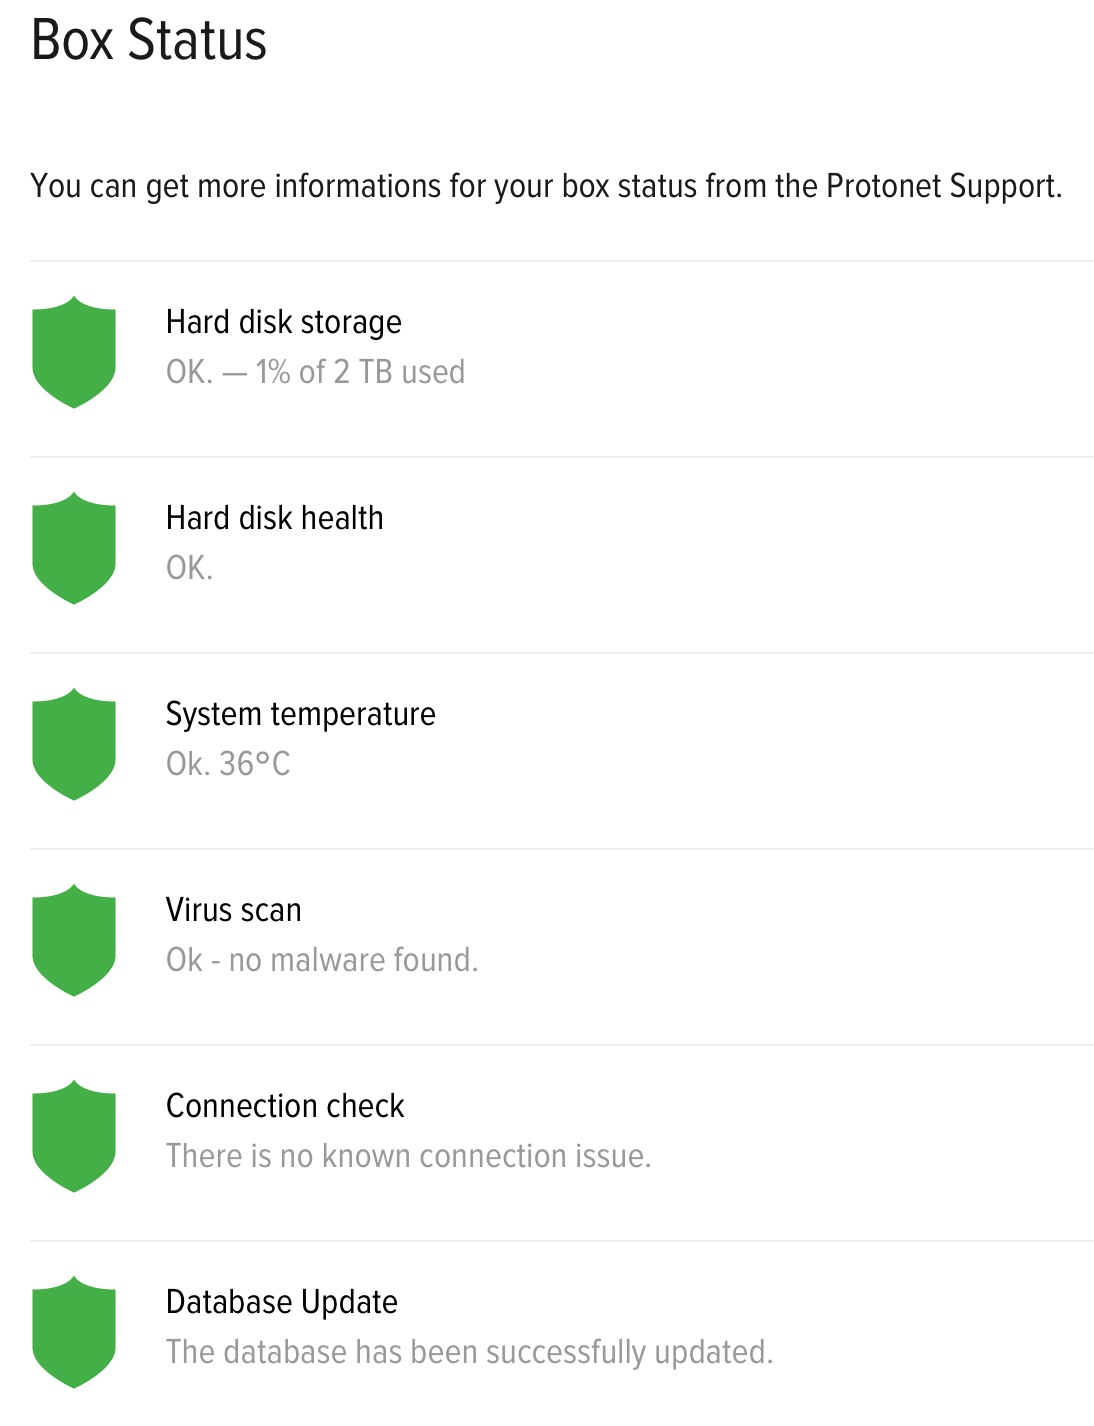
SOUL administrators can use the Box status page in System settings at any time to check for possible issues the Protonet server or network might have.
Hard disk storage
Shows used and total storage capacity.
Possible status messages:
- Green: up to 75% used
- Yellow: Over 75% used
- Red: Over 98% used
Recommended action for red status
Immediately remove files that are no longer needed or temporarily move files off the box. With a 12TB Carla, 98% are not critical. A Maya with 250GB capacity requires immediate action if 90-95% of its capacity are reached. Here is a short overview:
– Maya 250GB – 98% = 5GB free
– Maya 1TB – 98% = 20GB free
– Carla 12TB – 98% = 240GB free
Hard disk health
This section shows the status of the internal hard disc drives.
Possible status messages:
- Green: All drives are in normal condition.
- Red: At least one drive is not accessible.
Recommended action
Ensure that a recent backup is available and contact Protonet support for further analysis. You should not ignore this warning! There is a risk of data loss should another drive fail.
System temperature
Shows the current system temperature.
Possible status messages:
- Green: up to 80° C
- Yellow: up to 105°C
Recommended action:
Contact support, should the temperature not fall within 12 hours. - Red: beginning with 105°C
Recommended action:
Contact support for further analysis.
Virus scan
Shows the results of the last virus scan.
The virus scanner performs a check of all files once a week. It looks for new virus identification information every hour. If a virus is found, there is no threat for the Protonet server itself because it can not be executed on the server. The virus scanner only identifies potentially infected files that were uploaded to the server by users. It is no replacement for virus protection software on all other devices used to work with the server but is intended as an additional warning measure.
Recommended action
Research information on the malware found and remove the infected files if necessary.
Connection check
Shows whether there are any problems with the boxes connection and availability.
Included tests:
- Whether a network cable plugged in
- Whether the network or internet connection is interrupted
(by pinging an external IP address) - Whether there are problems with the nameserver (DNS)
(by resolving an external domain name)
Recommended action
Check the individual problem displayed. Administrators or internet service providers might be able to help: For example there might be an issue with the ICMP-protocol being blocked by the firewall. A reboot of your router followed by a reboot of your Protonet server might also help.
What happens in case of a hard disc failure?
A hard disc drive (HDD) failure is indicated to SOUL administrators in the navigation bar on the left and the Box status section of the System settings.
The section Hard disk health shows the status of the internal hard disc drives.
Possible states:
- Green: All drives are in normal condition.
- Red: At least one drive is not accessible.
Recommended action for a red status: Ensure that a recent backup is available and contact Protonet support for further analysis. You should not ignore this warning! There is a risk of data loss should another drive fail.
How is communication with Protonet servers protected?
The use of Protonet server can be done via LAN cable, Wi-Fi or via the Internet browser.
When using the Protonet server via WiFi we guarantee security through a WPA2 encryption.
When reaching the server over the internet the transmission of data occurs via 2048-bit SSL encryption, which is the standard for online banking.
How is data loss prevented?
RAID 5 is a group of drives where every drive keeps it’s own data and a bit of parity data. This way, if one drive in the group fails, its data can be reconstructed from other drives.
Can I install additional software or services on the Protonet server?
To ensure the stability of the Protonet software and protecty your data, we have decided to run SOUL on an persistent operating system. However, in individual cases there may still be technical reasons to set up additional configuration or services on the Protonet Server.
In general we advice to install additional software and services on the Protonet server within virtual machines.
Small customizations can be realized with so called local_patches.
Modifications of the Protonet server always happen at your own risk and not covered by standard support!
In case of any issues after modifications have been applied by adding custom configuration or shell scripts, any changes need to be removed to test whether they cause or trigger the problem. To do so it might be necessary to connect a HDMI display and a USB keyboard to the Protonet server.
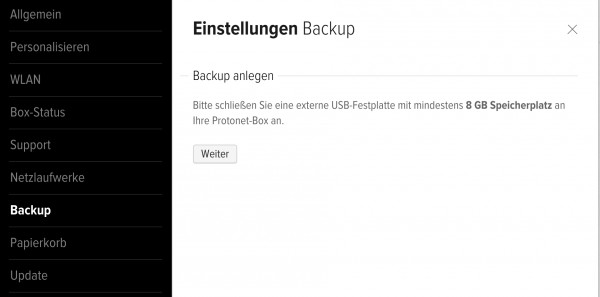
How do I create a backup of my Protonet server?
In SOUL you can start a backup to a memory stick or USB hard drive from System Settings under Backup. The page tells you how much free space your backup media needs to have at minimum.
Note: Besides the Protonet backup, no other data can be stored on the backup medium – anything else will be erased!
How are Protonet servers by default accessible via the internet?
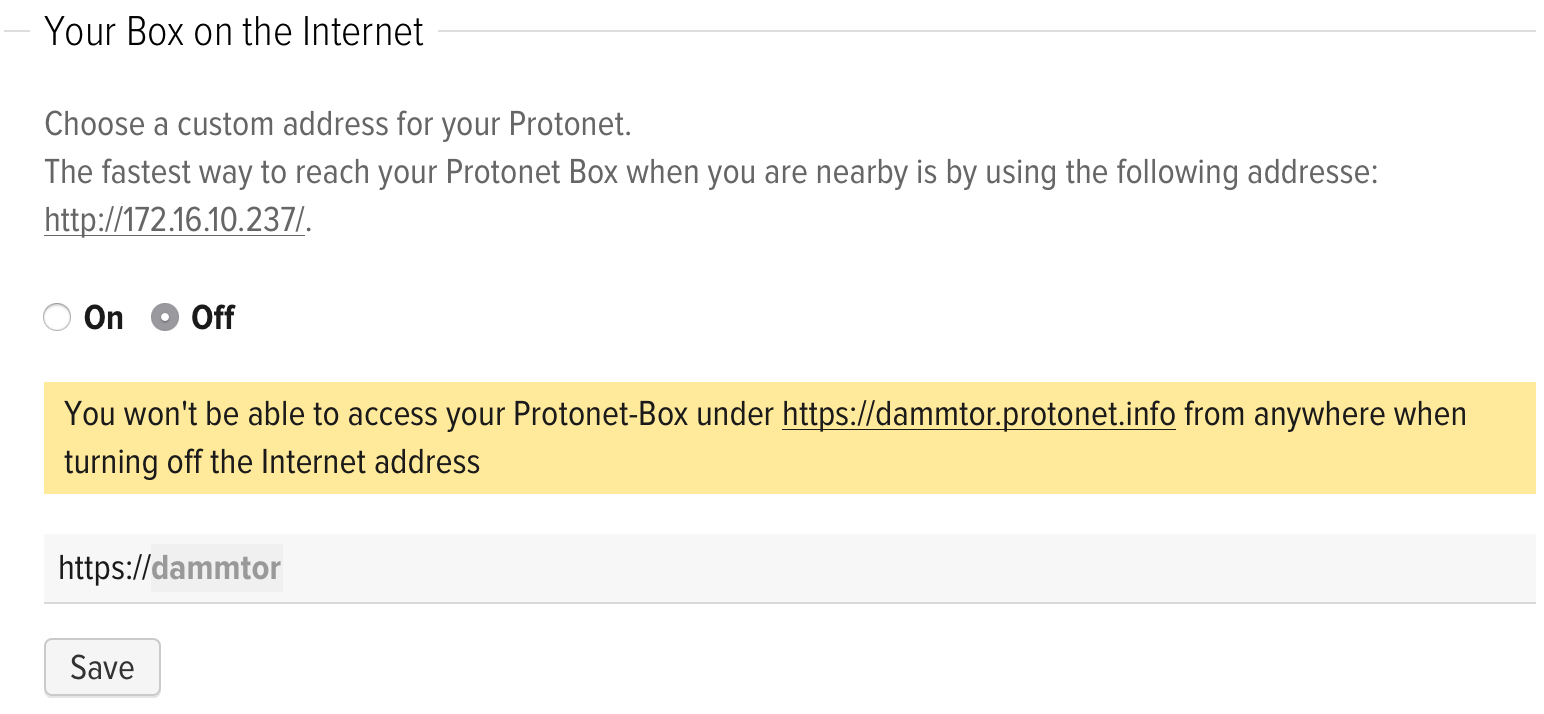
By default our servers are accessible via a proxy service. As soon as an internet connection is available the server connects to the proxy service, unless you disabled this in the ‘Your Box on the Internet’ section. The proxy service makes the box accessible via the chosen servername.protonet.info address.
Any traffic between your server and the proxy service is encrypted with a Protonet certificate.
It is also possible to use your own domain or a DynDNS domain (German instructions can be found here). Please ask Support in case you need assistance.
Regarding why we do it this way, there is a German blog post available here.
List of port numbers in use
This list of ports is irrelevant for most of our customers.
When shipped, the Protonet boxes are configured to just work with all the usual internet connections and receive all necessary network information automatically via DHCP.
Outgoing connections:
ssh (TCP 22666) for the protonet.info-address,
https (TCP 443) for mail dispatch,
http (TCP 80) for updates,
ntp (UDP 123) for time syncronisation,
webrtc (TCP/UDP 3478) for video calls,
dns (UDP 53) for name resolution,
smtp (TCP 25) for custom mail addresses and future mail dispatch.
Incoming when using your own domain:
https (TCP 443) for access to Soul.
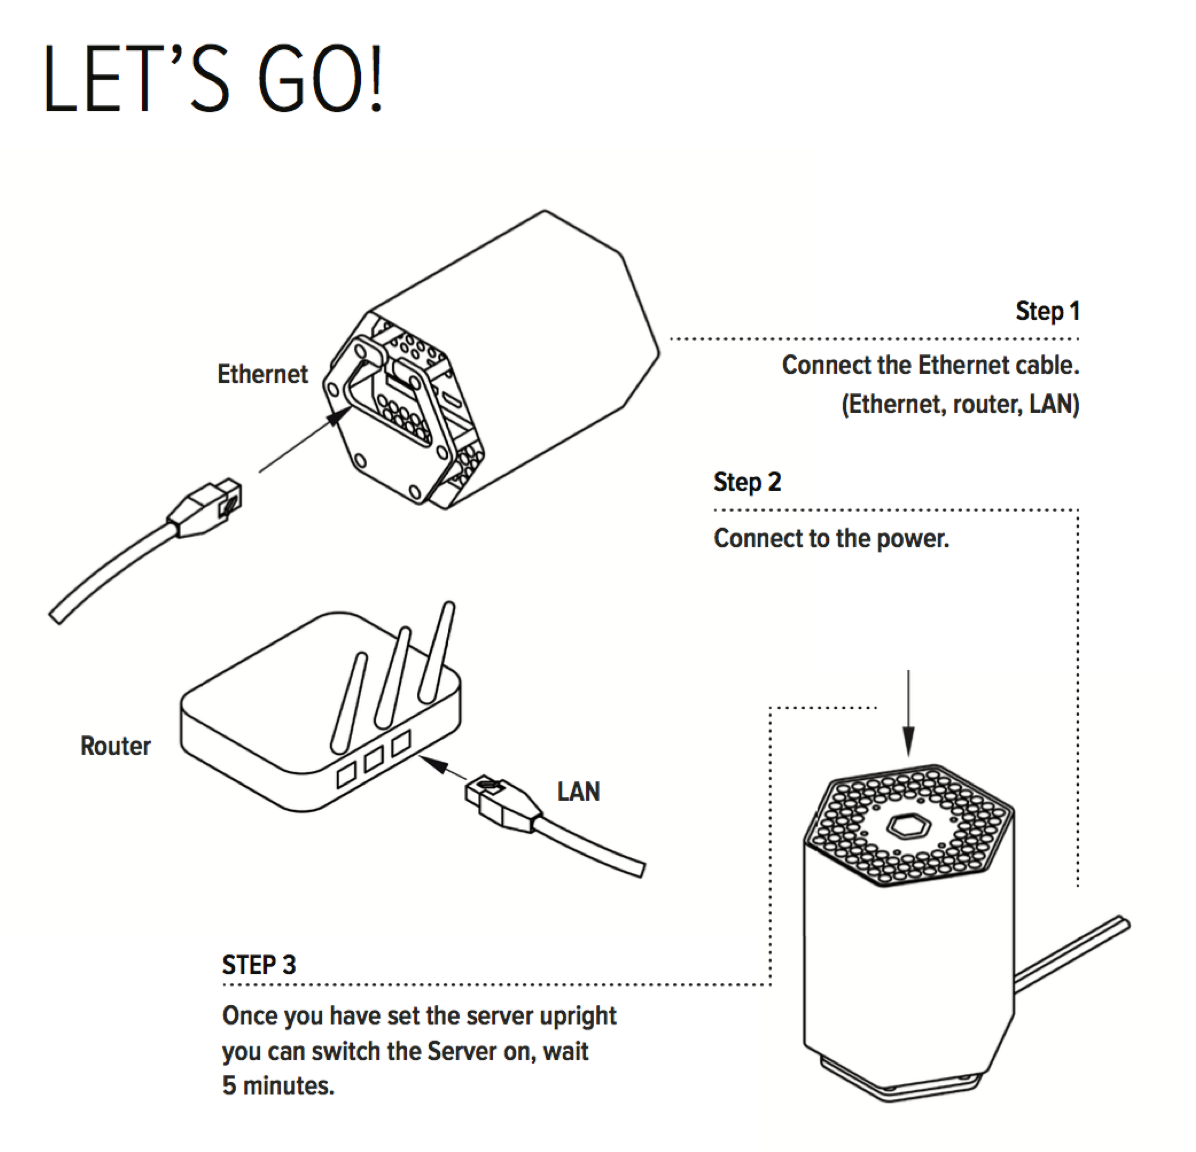
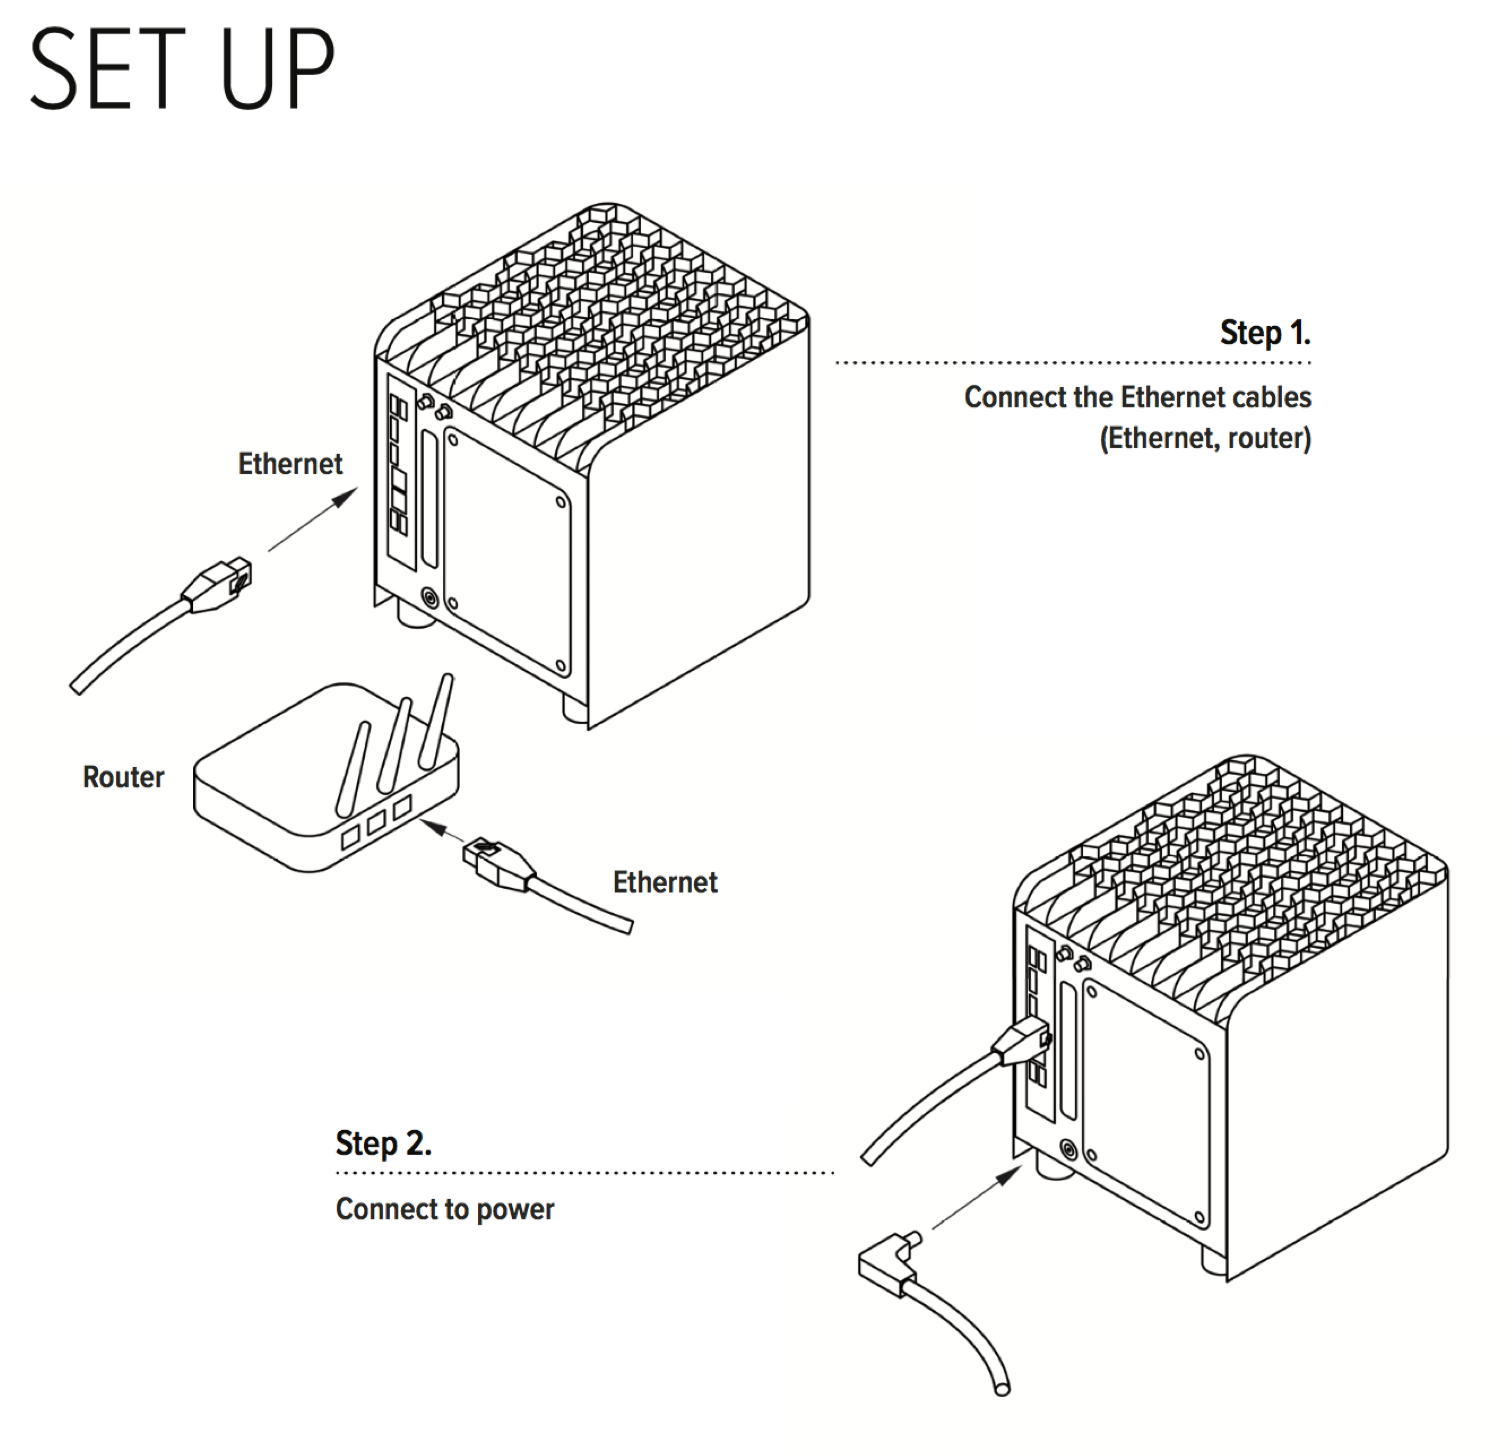
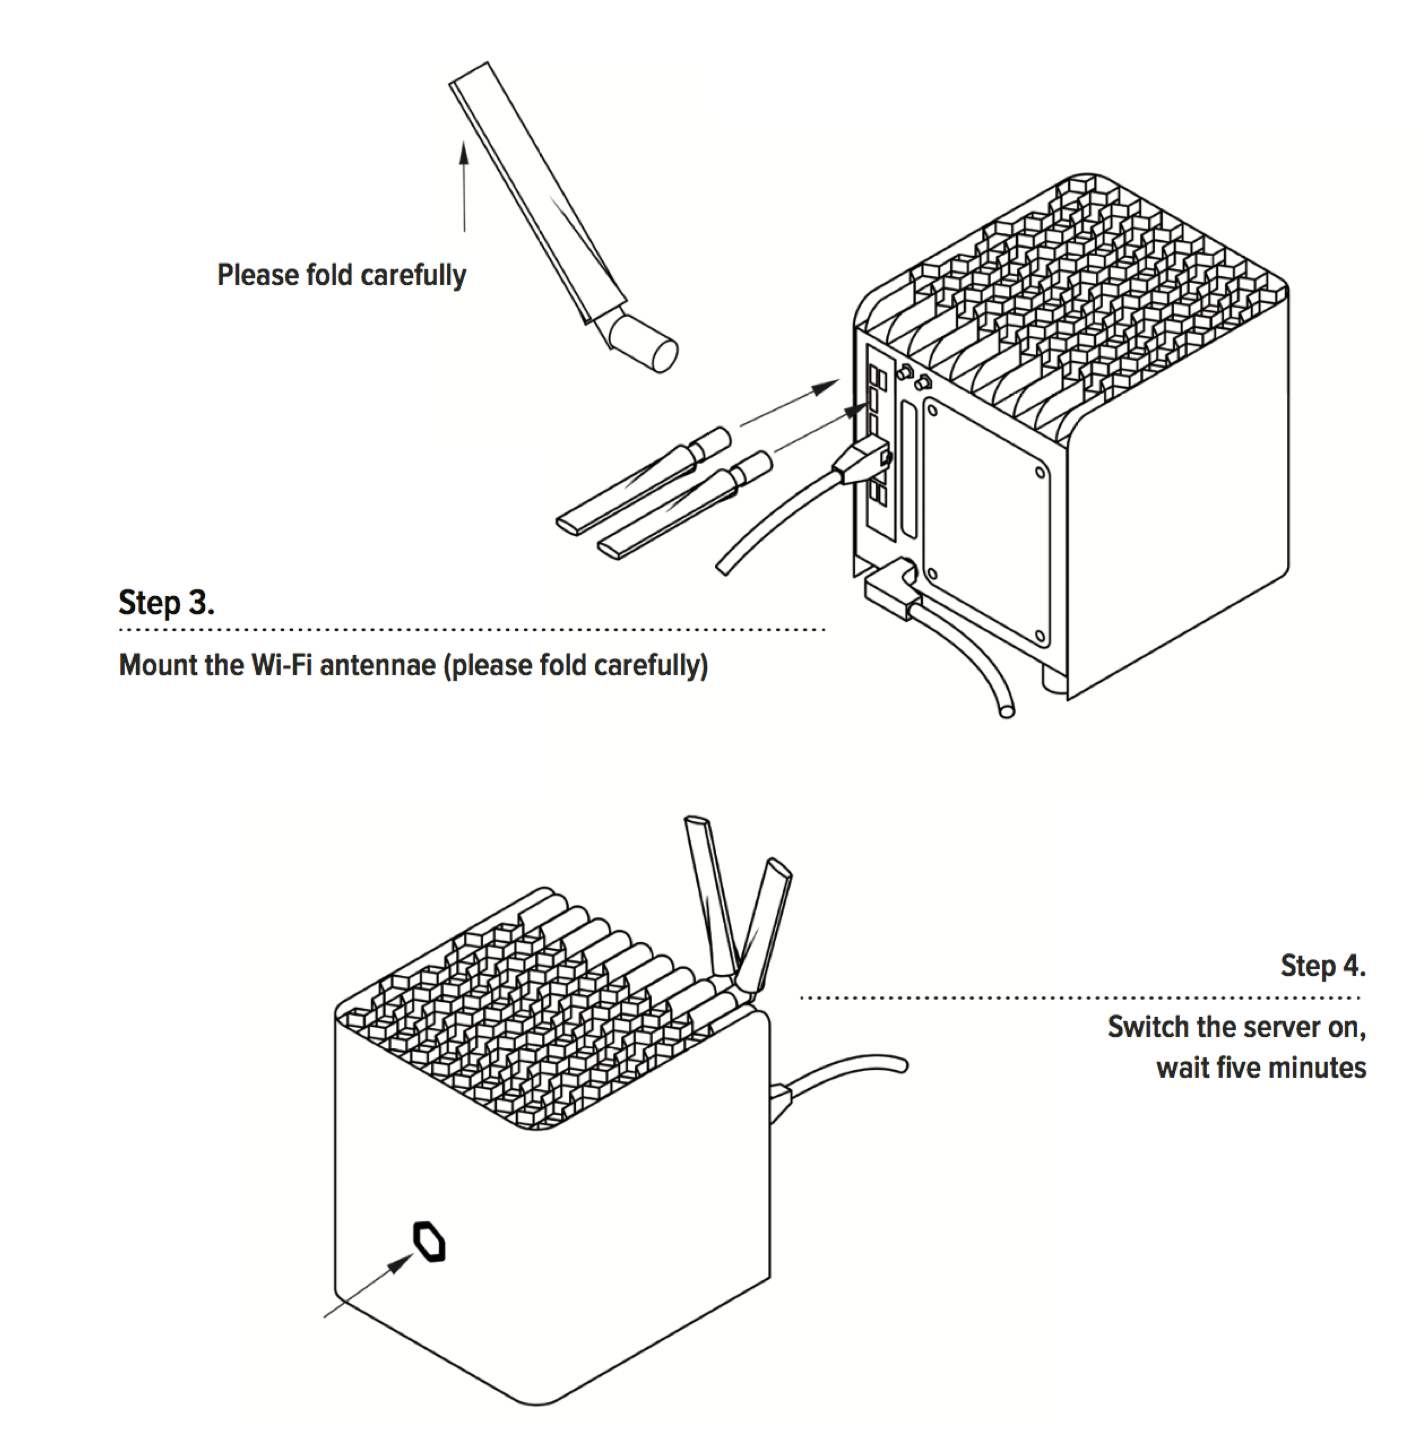
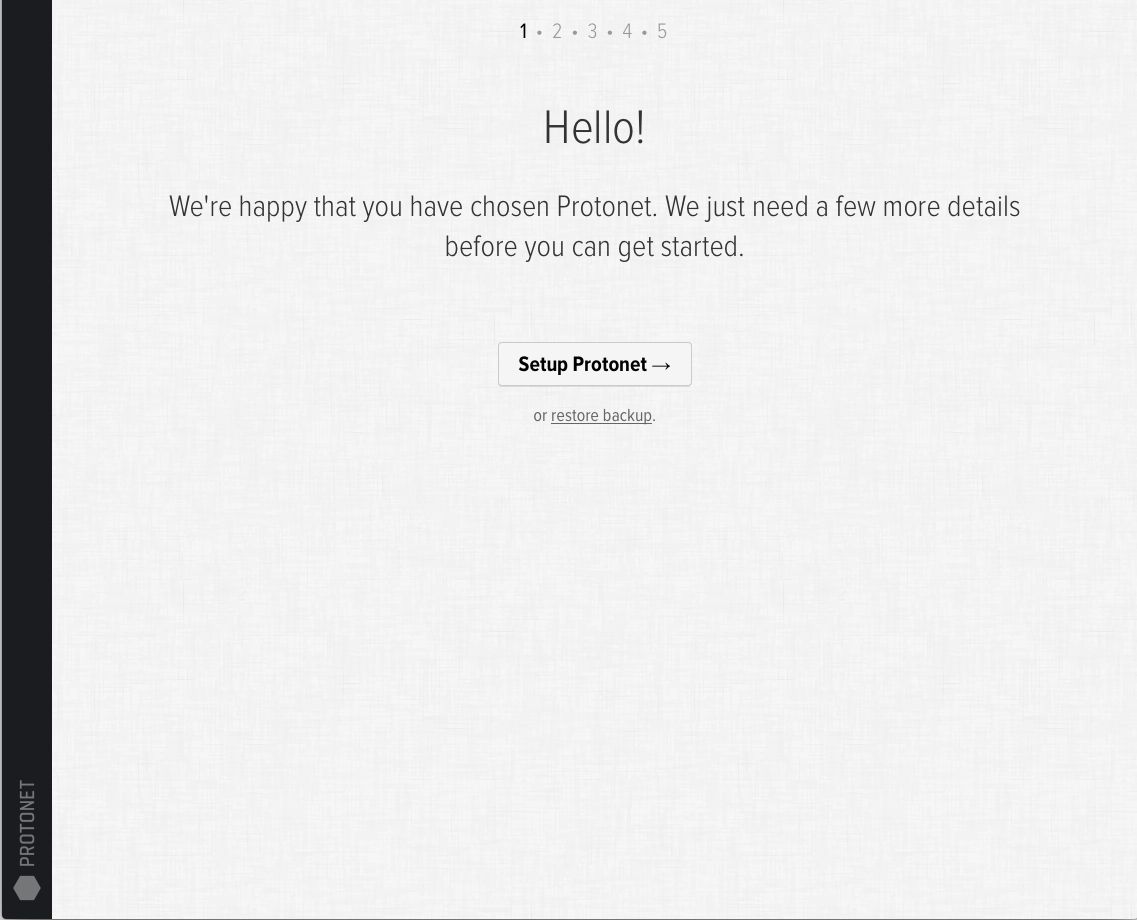
How do I set up my Protonet server?
Protonet Servers are sold with user instructions that cover the setup and initial steps.
The instructions cover the following:
1. Login
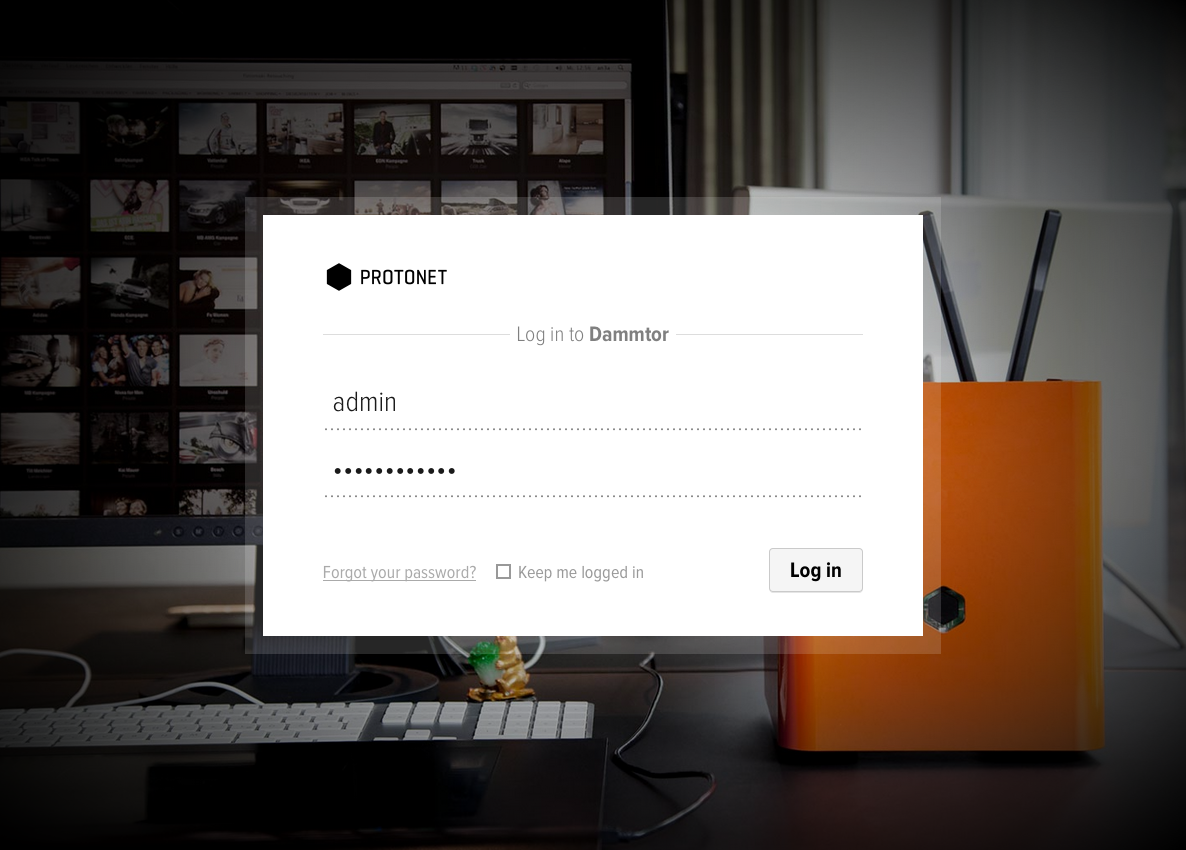
2. Restore from Backup or setup Protonet?
3. Successful network tests are required to proceed

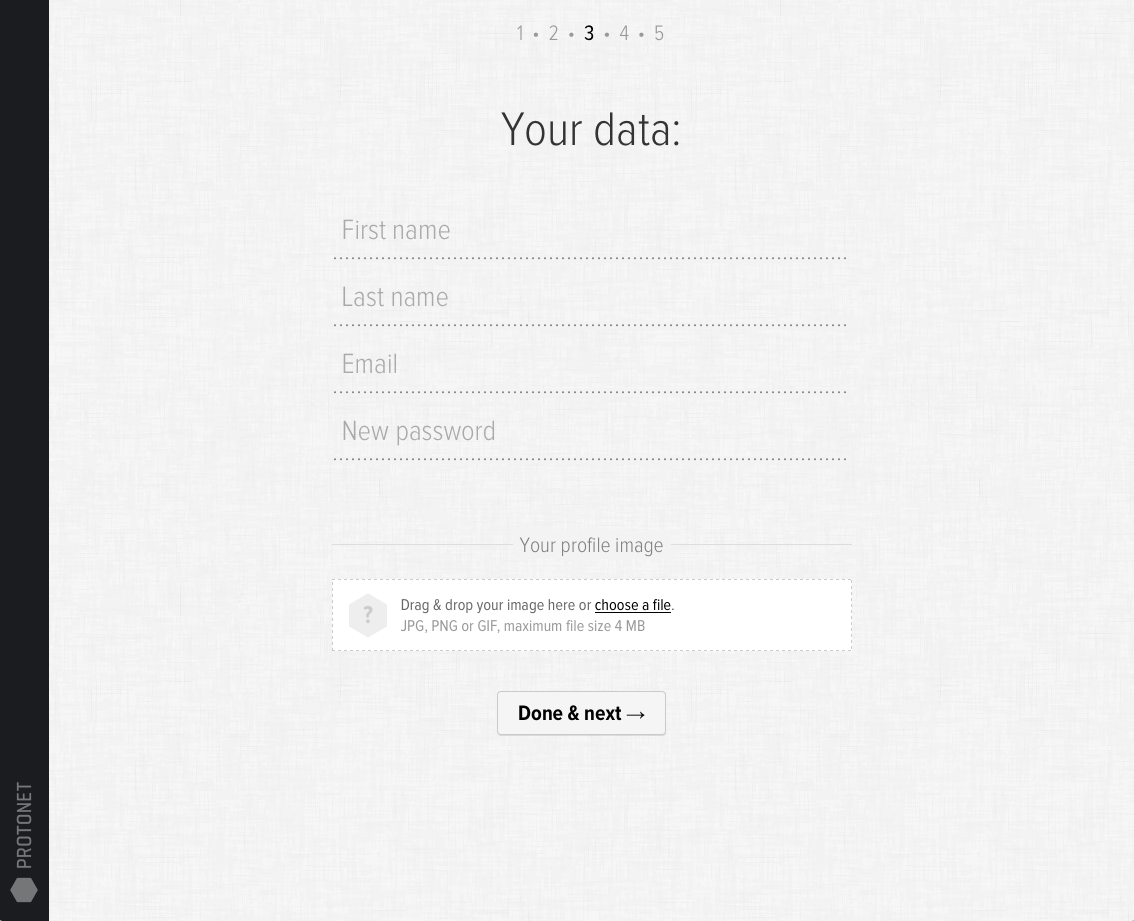
4. Setup user credentials are overwritten with personal data
The setup user ‘admin’ is no longer existent after this step. Please remember your name, email address and password!
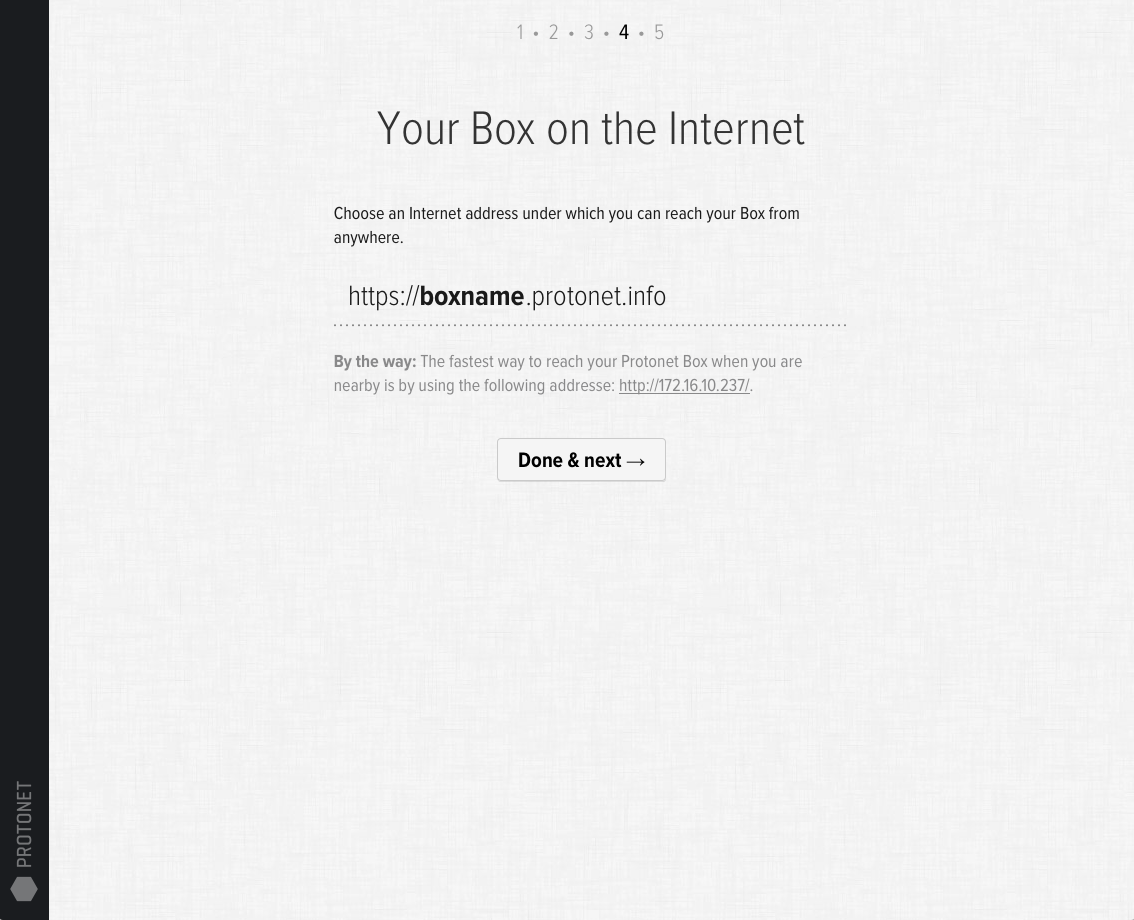
5. Choose internet address for the box / automatic licensing
If this step fails, please check whether your firewall requires configuration.
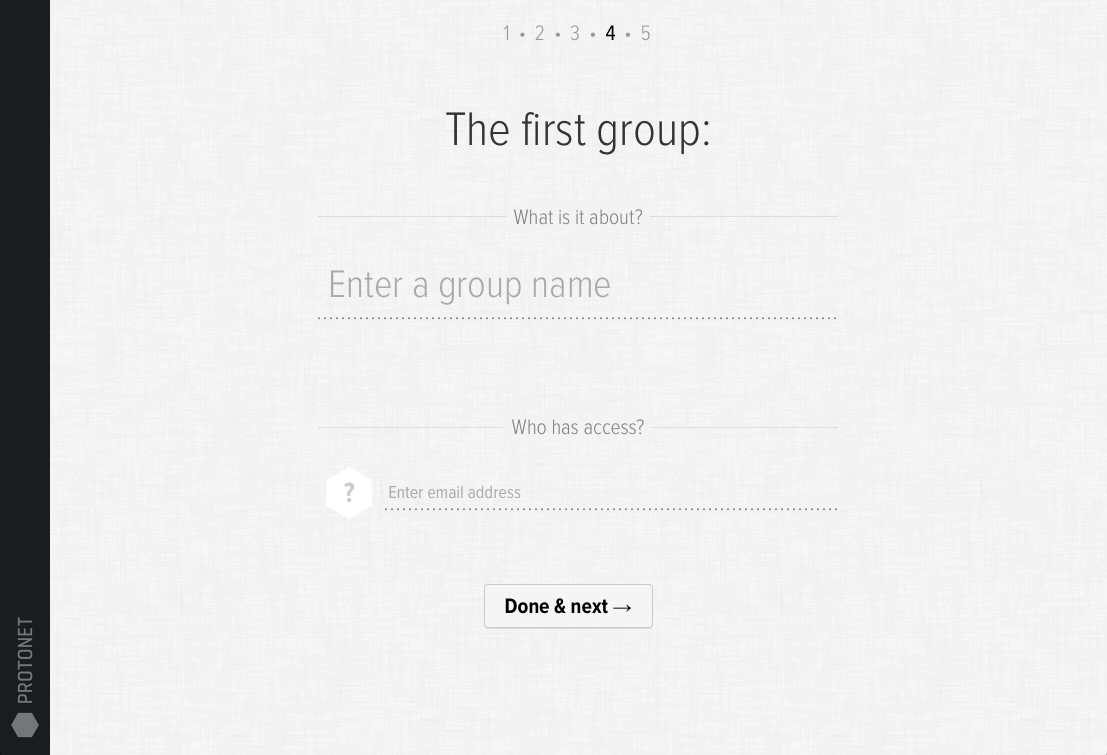
6. Name the first group, invite people and you’re done!
Can I switch off internet availability?
As a SOUL administrator the internet access can be switched off in the System settings.
Why am I sometimes unable to reach the Protonet solution?
When the availability of the server is interrupted repeatedly or the connection is very slow, the root cause often is a slow or unstable internet connection. This is usually the case if the upload speed is below 1 MBit/s either permanently or temporarily e.g. due to a high volume of data transfers such as downloads.
This can be easily diagnosed on our own by doing a speedtest:
If your computer uses the same internet connection as the Protonet server, you can simply use speedtest.net in your browser. Alternatively you can hook up your computer to the same network port that your Protonet server is usually connected to and run the test.
Sometimes too many devices are connected to the same switch and have to share its bandwidth!
Users with Linux know-how can run a test directly on the server. After logging onto the console, simply execute the command ‘speedtest’. (This forum thread explains the ssh login.)
For a seamless experience we recommend following specs:
Minimum requirement: 2 MBit/s upstream (for small data transfer volumes)
Recommended: 5 MBit/s upstream or more (SDSL/VDSL/Cable)
Minimum requirement: 6 MBit/s downstream (for small data transfer volumes)
Recommended: 16 MBit/s downstream or more
We also recommend talking to your internet service provider if the speedtest results are below the values expected. Protonet unfortunately is unable to assist in this issue.
Command line/SSH access to the Protonet server
It is possible to access the command line directly via ssh or by connecting a display and keyboard directly to the Protonet server.
The user name is protonet and the password is the current maintenance password.
MacOS or Linux – using ssh in a terminal
- With the internal IP of your server (find it on the Help page in SOUL or your routers device table) and the user protonet you can login to your server:
ssh protonet@[your servers IP]Note: Accessing your server over SSH via your Protonet internet address (boxname.protonet.info) from outside your network is documented in this article. - Enter your maintenance password into the password prompt and confirm by pressing enter. The password is not displayed while you enter it!
Windows – using an SSH client like Putty
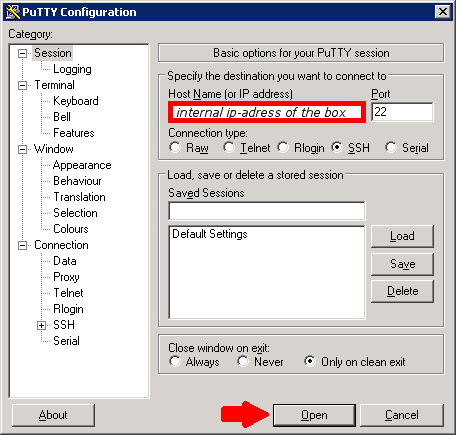
- Start the client and enter the IP address of your Protonet server in the corresponding field
- Press Open.
- Confirm the prompt wether to trust the server with ‘yes’.
=>A new windows opens displaying ‘Login as:‘. - Enter the user name
protonetand confirm with enter. - In the password prompt, enter your maintenance password and confirm with enter. The password is not displayed while you ebter it!
Note: You can not paste with CTRL+V in Putty but it works with a right click.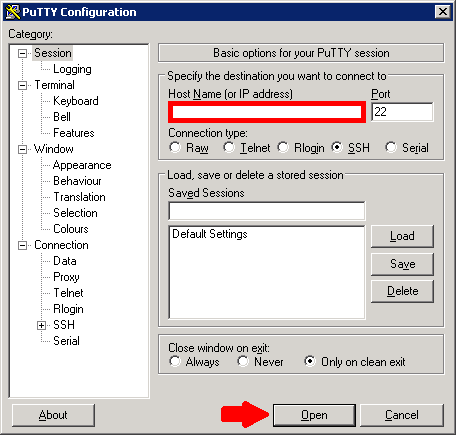
How to reset Protonet Servers?
To avoid the Protonet solution – including any data – is being reset by mistake, there is a command line utility available, which requires ssh access and the current maintenance password.
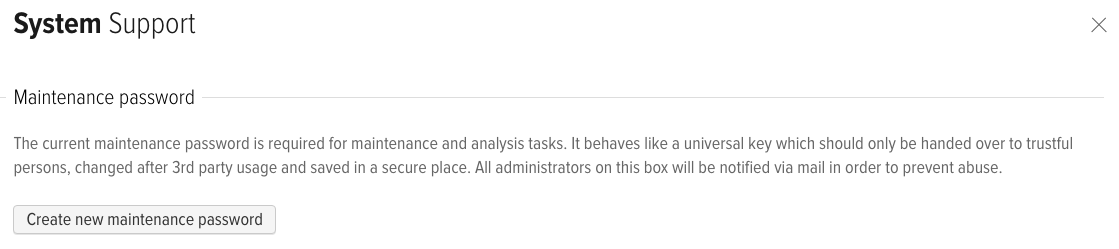
To generate the maintenance password in the SOUL web interface as a SOUL administrator you navigate to „System Settings“ -> „Support“. Here you click the „Create new maintenance password“ button.
1. On Windows
Please download and use putty.exe.
When you are asked for credentials, use protonet as username and the maintenance password generated.
1. On MacOS or Linux
Open a terminal on your mac and type „ssh *ip.of.your.box* -l protonet“
For example: ssh 192.168.1.21 -l protonet
You should now see something like this:
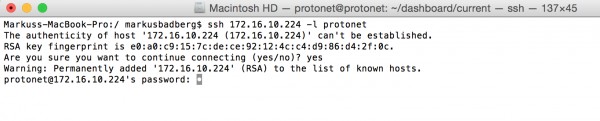
Here you need to type in the maintenance password.
2. On Both
Right after login start the reset process by typing:
sudo su –
self_destruction
reboot
Everything will be deleted now.
If afterwards you still see only the system settings untouched, this is correct for older Protonet Boxes (before autumn 2014).
How to switch off or restart the Protonet server?
After a short (!) push of the hexagonal button on the front of the Carla/Carlita or the top of the Maya the server will shut down. Once the lights in the button are off, the server is shutdown completely.
To restart the server, push the button again. This may take up to 15 minutes. Right before the Protonet solutions is up and running again, the button will show a black-and-white rotation animation. About 1-2 minutes after, the Protonet server should be ready and reachable.
Alternatively, you can use sudo shutdown -h now and reboot via the Linux shell.
Note: Once the server is shut down, it cannot be started remotely!
Should the server not be reachable after a restart, it might be for these reasons:
- Every 30 starts, the server is running a file system check to ensure data integrity. This may delay the server start for up to 45 minutes. To check if this is the case, you can connect a display to your server. A forced restart will not skip this procedure.
- There may still be an external USB memory stick or drive connected to the server. Please remove it and restart the server.
How to create virtual machines on Carla?
For implementing a VM with the KVM / qemu technology the following steps are necessary:
1.) Create a disk image containing the VM:
cd /protonet/data/var/lib/libvirt/
sudo mkdir images
cd images/
qemu-img create -f qcow2 disk-image-vm.qcow2 2T
qcow2 = format of the image that allows for snapshots to be saved
2T = size of the disk image, in this case 2 terabytes
2.) Upload the installation media, i.e. CentOS as an ISO image:
scp CentOS-7.0-1406-x86_64-DVD.iso protonet@<HOSTNAME>:/protonet/data/var/lib/libvirt/images/
=> Enter your maintenance password
3.) Installation of the operating system within the VM:
virt-install –connect=qemu:///system –name=linux-server –ram=4096 –vcpus=4 –disk path=/protonet/data/var/lib/libvirt/images/disk-image-vm.qcow2 –vnc –os-type=linux –network=bridge:br0 –disk /protonet/data/var/lib/libvirt/images/CentOS-7.0-1406-x86_64-DVD.iso,device=cdrom
–ram = memory (RAM) size in megabytes
–vcpus = number of processor cores
–network = set up as a bridge interface so the the VM is in the same network as the Protonet server
4.) Access to the VM:
ssh protonet@<HOSTNAME> -L 5900:localhost:5900
Use a VNC viewer to connect to localhost:0
5.) KVM management:
the KVM shell “virsh” provides all options via command line, i.e.:
virsh list –all => displays all VMs (running and stopped)
virsh start <VM name>
virsh shutdown <VM name>
virsh destroy <VM name>, if shutdown fails
Source: http://blog.onlinehelp24.net/post/97054196815/vm-auf-protonet-einrichten
Additional information from our support:
- When planning virtual machines, please remember that Protonet SOUL requires a minimum of 8 GB memory (RAM).
- If the following error occurs while installing a VM:
"Installation konnte nicht fertiggestellt werden: [...] could not open disk image /var/lib/libvirt/images/disk-image-vm-qcow2: Permission denied"
permissions must be corrected for the folder/var/lib/libvirt/images/like this:
chown -R libvirt-qemu:kvm /var/lib/libvirt/images/
Please note: Make sure SOUL still has a minimum of 8GB of RAM available.
Support might be limited if you modify the hardware or software and this leads to problems. Any modifications are at your own risk!
Can a Protonet server be connected to our network via wifi?
This is not possible. The Protonet servers wifi module is intended to provide wifi access, for instance as an alternative to a router or access point.
A free network port at a switch or a router is necessary to connect the Protonet server to a network.